
Adding a skylight to your bus can be one of the most nerve-wracking modifications you can make. After all, it kind of involves cutting a giant hole in your roof. And once you do, there’s no going back, so it must be done right. You probably have sweat beads forming on your forehead just thinking about taking on this task, right?. Fear not, though, because in our thorough step-by-step guide to adding a skylight to your bus we walk you through the entire process. We have also found some of the best bus skylights on the market to narrow down your options. But wait, why should you consider fitting a skylight in the first place? Well…
Benefits of a skylight
Ok, so the word ‘skylight’ kind of gives the game away here. Therefore, it goes without saying the benefit of one is (drum roll) light. This is an especially useful addition to your bus if its walls are either already replaced by windows (like many VWs are), or if there isn’t enough room for windows between your shelving and cupboards.
However, there are benefits to skylights that stretch beyond light beams, starting with ventilation. Most skylights have an open-close mechanism that allows you to let out heat, smoke, and bad odors. Since we spend so much time in our tiny home on wheels, it’s very important to get that good, good air flowing in now and again.
Also, the more time we spend in our bus without allowing a flow of air in, the more likely it is to build condensation — and we all know what that means. Mold. And we know all too well how it loves to hide out of sight until it’s too late to remove. Therefore, skylight ventilation isn’t just healthy for us, it’s healthy for our bus too!
Of course, we have saved the biggest benefit of fitting a skylight ‘til last. Stargazing from the comfort of your own bed!

What can go wrong?!
Now, we couldn’t mention the benefits of fitting a skylight without fair warning of the potential problems it can cause. And the fact is that if you plan to cut a hole in the roof of your van, there is a risk involved.
Again, let’s state the obvious first. You must cut the hole in the roof with expert precision to make sure your skylight is airtight and watertight when fitted. If it’s too big, there’s risk of your skylight not fitting into the hole at all. In this case, well, at least airflow wouldn’t be an issue and you’d get a free shower now and again. If you don’t like the sound of having a giant hole in your roof, just fit a larger skylight instead. Oh, and perhaps get someone else to fit it next time, too.
Even if you cut your roof accurately, and the skylight seems to fit snuggly into the hole, there’s still a risk of leakage. Somehow, water always finds its way into gaps, no matter how minute, and although it might not be immediately noticeable, after a few heavy downpours, these small leaks can become problematic. This is a risk everyone fitting a skylight to their bus must be willing to take and give their time and attention to fixing if the problem arises.
What are the best skylights on the market?
MPK Skylight Vision Vent
Built with bathroom ventilation in mind, the MPK is excellent at letting fresh air in and stale air out. It features a ventilated smoke glass hood with a condensation water stop, a large roof overhang for rain protection, and a pleated roller blind to shut out the light when it’s not wanted. While it may be beneficial for air circulation, it might prove too chilly for winter-bound buses.
Fiamma Crystal Caravan Rooflight
As one of the more affordable options on the market, the Fiamma skylight is slightly less robust than its peers. However, its simple design still performs well due to its aerodynamic shape and permanent ventilation. This skylight is particularly appealing to those who are nervous about drilling more holes in their van because it utilizes a sandwich system to attach it to the roof instead.
Maxxair SkyMaxx Rooflight Vent
Maxxair has gained a winning reputation in the vanlife community for its top motorhome products, and its skylights are no exception. Its thoughtful design allows the user to choose whether they want ventilation even when the window is closed by inserting interchangeable vented and non-vented panels into the device. It also features a three-level window positioning and a black-out blind for comfort and privacy.
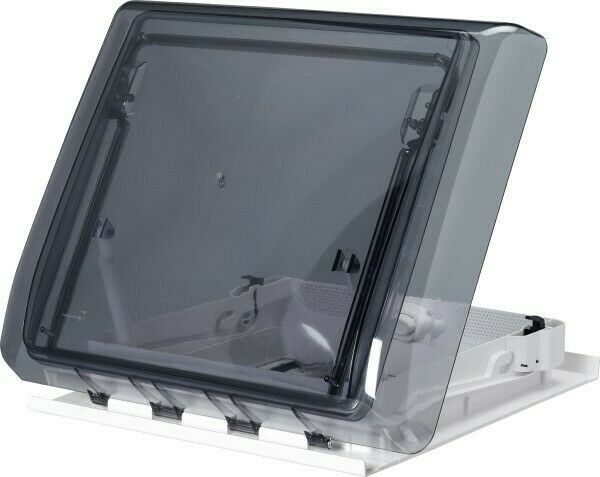
Dometic Mini Heki
This leading skylight by Dometic is a favorite amongst Buslifers for its function and form. The window is curved for optimal aerodynamics and it can be opened in three positions to suit different requirements. It can be fully open, half-open, or left ajar so that air can get in and out, but rain can’t. Its design is arguably the most attractive of all skylights on the market too. Ideal if you ask us!
How to fit a skylight
First things first, here’s what you need to install your skylight:
- Jigsaw with a fine blade
- A heavy-duty file
- Rust prevention paint
- Butyl tape
- Masking take
- Sikaflex
- Mastic
- Ruler
- Marker
Now, here’s your step-by-step skylight fitting guide
- Decide where you want your skylight to be fitted from inside the bus. Then, find the center point of the area by measuring the width and length of your skylight and marking where those dimensions meet
- Drill a hole through the roof where you have marked the center point of your skylight; this will be your reference point when marking the hole for the skylight from the roof
- From the roof, use the hole you drilled as the center point from which to measure the width and the length of the skylight and mark each point
- Using your marker and ruler, join each point you have marked on the roof to make a perfect square. Then, reinforce it by placing masking tape along the inside seam of each side of the square
- Using the inside seams of the masking tape as a guide, cut out the skylight hole with a jigsaw. Ensure the cuts are as straight as possible
- Now that you have the square hole in your roof, check the proportions are accurate by placing your skylight inside it to make sure it fits snuggly
- File down the raw edges of the hole to ensure they aren’t a safety hazard. Once satisfied, paint the edges with rust preventative like Hammerite
- Using the same measurements as the skylight, make a timber frame to be secured around the inside edges of the roof hole. Remember, the depth of your timber frame must match the depth of your other ceiling beams
- Next, apply butyl tape to the top edges of the skylight hole. Layer as many as is needed to become level with any ridges on the bus’ roof. Once complete, secure your skylight into the hole using sikoflex around the edges as an adhesive.
- Remember to check you are happy with the skylight’s position from inside and outside the bus before the sikoflex hardens, adjusting it as needed. Once you are happy with the position, you can further secure the skylight with any screws provided
- Finally, screw the plastic frame that comes with the skylight into the wooden beams you fitted inside the bus. This secures it further and gives it a professionally finished look
For those that would prefer a visual reference, this video by Richie Ros demonstrates the process very well.
Is my bus safe with a skylight?
The small issue with skylights is that they don’t usually have a lock mechanism, making them a target for break-ins. Fortunately, there are a few ways to combat this and ensure you and your bus are thief-proof.
The first strategy is simply to buy a skylight that is too small for the average-sized adult to fit through. If a wide-shouldered man attempted to shimmy through your 28x28cm skylight like Santa Claus, there’s a good chance they would either quickly give up or get stuck (giving you the chance to catch them red-handed).
Alternatively, you can consider installing a security bar like this one from Woho-Sicherheit. It acts as a stable and secure barrier across the center of your window, which would stop anything except a cat from attempting to slide through your skylight.
Servicing your skylight
Now that you’ve gone to all that effort to find and install the perfect skylight for your bus, you want to make sure it lives a long, healthy life. Since the skylight is constantly exposed to the elements, it’s important to do regular maintenance checks. Dirt from rain, wind, dusty air, and unlucky insects can get clogged around the edges of the skylight which can prevent it from closing properly and keeping your bus watertight. So, every now and again (preferably when there’s a really good view to check out) hop on your roof and give your skylight a good clean. While you’re up there, check that the mastic isn’t peeling away, or that there are any other gaps forming around the edge of your skylight. If there are, just fill them in with some fresh mastic or whatever you have to hand.
For a full guide to your VW Bus interior renovation, click here.
Author: Emily Draper
Having visited over 70 countries across all seven continents, it's safe to say Emily has the voice of a true traveler. She has lived with the Hare Krishnas in Chile, an Amazonian tribe in Peru, and a retiree named Jerry in a Wisconsin trailer park. Now, Emily has embarked on the coolest adventure yet: across Europe in her self-converted bus.

[…] Unless you’re planning to eat your fruit and veggies a day or two after purchase, they are more likely to end their life in the trash (or compost if you can) than in your belly. With a refrigerator, however, food will stay fresh for longer and you’ll end up with much less waste. Plus, it’s always a good idea to create extra ventilation with a skylight, which you can learn more about here. […]